How to Play
Every number on this page is the number the game actually uses. If something here does not match what happened to you on the wave, the page is wrong. Tell me at support [at] amaru.surf.
Quick start
- Turn the board with left and right on the stick, the arrow keys or your left thumb. You always go where the nose points.
- Ride along the edge of the whitewater to get into the barrel. Time in there pushes the whitewater back.
- Ride up over the lip to jump. In the air, push the way the chip at the top of the screen points, and let go of the stick when it turns into a flat bar. That is the landing window: the nose between 25° up and 40° down.
- Stay above the bottom of the wave, out of the whitewater, and clear of sharks, buoys and driftwood. Each of them wipes you out and costs a life.
- When Amaru rides with you, finish the heat without a wipeout and it pays +50%.
Controls
Playing on a phone or tablet
Two thumbs: the left one steers, the right one spins. Neither has a spot you have to find, and the controls are only drawn while you are using them, so the rest of the time the wave is not covered in buttons. iPhone, iPad and Android all work the same way.
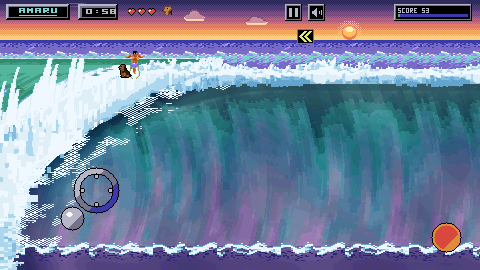
- Put your left thumb down anywhere on the left half of the screen. Wherever it lands becomes the centre of the stick: a ring appears under it, and goes when you lift it. There is no spot to find and no dead zone: a thumb that has not moved is exactly centre.
- Slide it right or left to turn the board. Right turns the nose clockwise and left anticlockwise, so heading right, pushing right points you down the face. Up and down do nothing on the wave. A slide of about the ring's own width turns as hard as the stick goes, and the last tenth of that is the sharp carve, which turns faster and sheds speed. The knob stops at the end of its travel, however far your thumb goes.
- Ride up over the lip to get airborne. There is no jump button. Cross the top of the wave climbing at 15° or more and it throws you; any flatter and it holds you on the rail instead.
- In the air, hold your right thumb down to spin faster. Anywhere on the right half of the screen counts except its top fifth; the round button in the bottom-right corner shows you where, and turns red while it is held. The stick still does the turning. The button only makes it faster, so keep the stick pushed while you hold it. Riding the face, the button does nothing.
- To land, watch the top bar, not your surfer. A chip under the pause and mute plates points the way to push: « left, » right. When it flattens into a bar you are inside the landing window. Lift your left thumb, or slide it back to where it landed, and let the board come down.
- Pause and mute are the two plates in the top bar, just right of centre. Tap II and the game stops, with PAUSED and ACTION TO RESUME on the screen: tap the right half again, or the plate, to carry on. That tap does not start a spin. The speaker plate beside it turns the music off and on, paused or not. In a WiFi room heat there is no pause, only mute.
A few more things worth knowing:
- Both thumbs work at once: steer with one while the other holds the button.
- A thumb belongs to the side it landed on for as long as it stays down. Your steering thumb can slide past the middle of the screen and keep steering, and a thumb that started on the button keeps it held while it drifts.
- Only one thumb steers: the last one to land on the left half. Lift it with another finger still down there and that one takes over.
- The top fifth of the right half does nothing apart from the pause and mute plates, so a thumb resting by the score never holds the button down.
- The ring is only there while your left thumb is down. The button stays drawn until nothing has touched the screen for two seconds.
- In a heat with another rider, VS COMPUTER or over WiFi, you drop in behind a countdown. Press the right half during yours to go early.
Touch, keyboard and controller
A controller works on every platform and needs no setup: pair an MFi, Xbox or PlayStation pad and it steers. Buttons are read by position, not by label, so the bottom of the face diamond is the action button whatever your pad prints on it. The phone and the desktop build the same input stack, with no separate pad handling for either, and a pad connected while the game is running is picked up where you are standing rather than at the next screen.
What the game can read is any pad the system maps to the standard layout: sticks, D-pad, a face diamond, shoulders, Start. Every mainstream pad does. Something unusual enough that it cannot be mapped is not read at all, rather than read wrongly, and it does not count towards the two pads couch play asks for.
| Touch | Keyboard | Controller | |
|---|---|---|---|
| Steer | A virtual stick appears wherever your thumb lands on the left half of the screen. There is no fixed position and no dead zone: a thumb at rest is exactly centre. Only left and right count. | ← → | Left stick or D-pad. The D-pad wins on any frame it is pressed. |
| Action | Anywhere on the right half of the screen except its top fifth. The round button in the bottom-right corner marks it. | Space | The bottom face button, A / ✕ |
| Pause | The II plate at the top of the screen. | Esc or P | The Menu / Start / Options button |
| Back | The screen's own way out: its BACK, CANCEL or MENU plank. | Esc. In a heat it pauses instead | The right face button, B / ○. In a heat it does nothing until you pause |
| Mute | The speaker plate next to pause. It turns the music off and on; the sound effects keep playing. | M, on the title and settings screens only | The View / Select / Share button, in a heat; on the menus, the MUSIC row in settings |
The action button is a spin button, not a jump button. You do not press anything to get airborne. You get airborne by riding up over the lip. In the air, hold it to spin faster: you bank more of a turn, and you have less time to bring the nose back for the landing. Tapping it does nothing on its own. While you are riding the face, the button currently does nothing either.
Inputs are peers, not modes: the keyboard stays live alongside a pad, and on a phone a thumb on the glass wins over both. Pausing stops the game dead (the heat clock holds, nothing moves, nothing spawns), but the music keeps playing, because it is the run's soundtrack. To resume, press pause again, press Back (Esc, or B / ○ on a pad) or press the action button. The action button swallows that press, so you do not also start a spin on the way back in.
There is no pause button in a networked room heat; a heat you are sharing over WiFi cannot be stopped by one player.
Riding the wave
The stick rotates the board. Nothing moves the surfer directly. You always travel in the direction the nose is pointing. Steering is entirely a matter of where you have aimed and how fast you are going.
Speed
Nose down the face gains speed; nose up the face sheds it. Climbing only costs 35% of what the same drop gains, which is what makes pumping work. Speed is what carries you along the wave, up to the lip and back into the pocket. It is not what holds the whitewater off.
- Slowest you ever go: 40 px/s
- Terminal speed of a full drop: 260 px/s
- You drop in at 110 px/s
The sharp carve
Hold the stick past 90% of full deflection and the board turns faster, but it sheds speed while it does. That is how you come into the pocket under control: at full tilt the line that gets you barrelled runs you straight through the edge and into the foam.
The break
The whitewater on the left creeps across the screen whenever nobody is in the barrel, and only time in the barrel pushes it back. Going fast does not hold it off. It is the pressure the whole game runs on, so it has a section of its own.
Three things kill you
- The trough. Ride below the flat bottom of the wave and it breaks on you.
- The foam. Cross the whitewater boundary and you are swallowed, unless you are railing the lip (see below).
- Obstacles. Sharks, buoys and driftwood drift down the face at you.
The lip is not one of them. Crossing the top of the wave either launches you into the air or holds you there on a rail. It is the safest line on the wave and the one that pays best.
The break
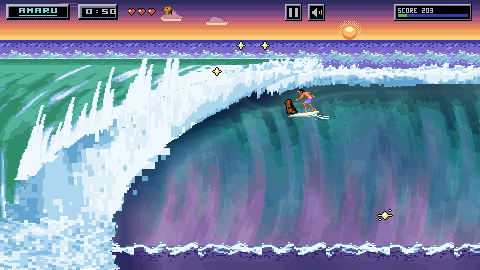
The wave squeezes you, and the barrel is how you win the screen back.
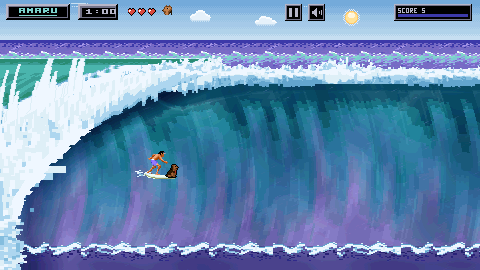
- Every heat starts with the foot of the whitewater almost at the left edge of the screen. That is the most open the wave ever gets.
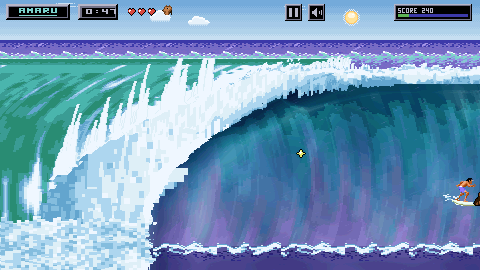
- While nobody is in the tube, the break creeps forward on its own. It reaches its cap (the foot of the foam five-eighths of the way across) at half-time of every heat: 30 seconds into heat one, 50 into heat six.
- At the cap the top of the face is whitewater all the way to the shoulder. There is no room left for an aerial, and the only water to ride is the lower right.
- Speed has nothing to do with it. Riding fast does not hold it off and riding slow does not bring it on.
- Time in the tube pushes it back, four times as fast as it creeps: one second in the barrel wins back four seconds of creep. It never goes back past where the heat started.
- A wipeout does not reset it. The wave keeps breaking while you tumble and blink back in.
- Whatever the break overtakes, it washes away: stars, sharks, buoys, driftwood.
Spend a fifth of your ride in the barrel and the break stands still. Any more than that and you are taking the screen back. Where it stands still is up to you: let it come in a little, then go to work.
The creep is 9.6 px a second on heat one and slower on the longer heats, so the cap still lands at half-time: 5.8 px a second on heat six. The barrel always pushes back at four times that heat's creep: 38.5 px a second on heat one, 23 on heat six.
In a two-rider heat there is one wave and one break. Either rider in the tube pushes it back, and both in at once is no faster than one, so take turns. The break also waits for the start gate: it does not move until the first rider has been released.
Landing a jump
This is the thing players fail at most, and the rule is simpler than it feels.
1. Getting off the lip
You launch by climbing over the top of the wave. There is no button. The only requirement is at least 15° of climb as you cross. Anything shallower and the wave just holds you at the lip on a rail instead.
The lip throws you, so even a climb that bled most of its speed still pops a readable aerial. But the angle you arrive at decides how big it is:
| Climb as you cross the lip | What you get |
|---|---|
| Under 15° | No launch: you rail the lip instead |
| 48° | The perfect launch: 1.6× speed off the lip |
| Within a few degrees of 48° | Nearly all of it, because the falloff is gentle |
| 35° or more away from 48° | The floor: 1×, still an aerial, just a small one |
That speed is banked back into your momentum when you land, so going big does not leave you crawling on the face afterwards. A perfect launch is worth chasing.
2. In the air
- The stick still rotates the board, and that is what sets your landing angle
- The stick also drifts your arc sideways, so you can steer where you come down
- Scoring is the rotation you actually turn: every quarter-turn the board completes is one trick. A quarter is two of the eight board angles the art is drawn at, so you can see each one you bank
- Hold the action button to spin faster: more quarters in the same air, and more angle to kill before you land
- Turning back the other way keeps the quarters you finished and drops the part-turn you were in the middle of, so wiggling the stick banks nothing
- A bigger launch hangs longer; the ceiling caps your height, never your hang time
3. The landing window
Land with the nose between 25° up and 40° down and you are fine. Outside that, you wipe out.
That is the entire rule. It is not about speed, height, rotation count or where you land, only which way the board is pointing when it touches the wave.
The window is deliberately generous on the nose-down side, because nose-down is the natural way to come back onto a wave. The way people crash is by spinning past it: the stick keeps rotating the board for as long as you hold it, and a full-rate spin carries the heading straight through the window and out the other side.
The chevron is telling you what to do
Look at the top bar, not at your surfer. The hint is a chip hanging just under the pause and mute plates: one fixed place you can learn, rather than a mark that wanders around the wave with your board.
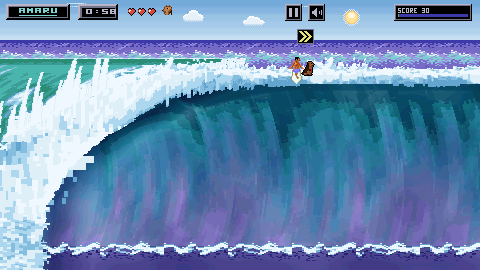
It appears the moment a rider leaves the lip and it is gone the moment they land; nothing else in the bar shifts to make room for it. The mark is a double chevron, and it is not decoration:
- « pointing left: you are past 40° nose-down. Push left.
- » pointing right: you are past 25° nose-up. Push right.
- A flat bar: you are inside the window. Stop touching the stick.
The flat bar is deliberate. A hint that vanished the moment you got it right would never show you what right looked like.
In a solo heat it is the chevron on its own, in your board colour. In a two-rider heat each rider gets their own chip, labelled P1 or P2 and drawn in that rider's board colour: pale yellow for player one, red for player two, the colours the two decks wear on the wave and the same two the start-gate countdown uses. Each seat keeps a slot of its own, so one of you taking off never shunts the other's chip sideways.
It shows direction only, never a number. If you learn one thing from this page: spin for the score, then straighten up and wait for the flat bar. A sloppy landing pays nothing at all (the wipeout is the price), so the rotations you did on the way down are worth exactly zero if you ride it in nose-first.
The rail
Also called a floater. It is the move you get by failing to jump, and it is one of the best moves in the game.
Cross the lip at less than 15° of climb and the wave does not launch you. It carries you, pinned along the top of the crest. While that lasts:
- The foam cannot swallow you. You can ride straight over the broken section of the wave. That is the entire point of the move.
- It pays a flat 45 points a second
- It lasts a maximum of 2.5 seconds
And the cost, which is real:
- You shed a lot of extra speed up there, and the usual speed floor is lifted. You can genuinely grind to a halt on the crest, and nobody up there is in the tube, so the break keeps coming
- In practice the drag usually ends your floater before the clock does
How it ends
Only the clock ends it. When your 2.5 seconds run out:
- Over open face: the crest spits you back down onto the wave at a shallow nose-down trim. No penalty.
- Over the foam: the immunity ends and the whitewater takes you. Wipeout.
So a rail is a raid, not a parking spot: get across the broken section and get back onto clean water before the clock runs out. The rail budget unwinds at the same rate once you are back on the face, so you earn it back in real time and cannot chain floaters into a park.
The barrel and the escape boost
Getting in
Carve back towards the whitewater and hold a line within roughly 27 px of it, and you latch into the tube. Come in under control (a sharp carve scrubs speed), because the line that gets you barrelled at a sensible pace runs you straight through the edge at full tilt.
Once you are in, the wave opens a cavity around you: the foam edge pulls back by up to 36 px, locally, at your height. That hollow is the room you have to move and trick inside, and it follows you while you stay in it. The kill line moves with it.
And the whole break backs away from you: that is the barrel winning the screen back. So staying in means following it: keep drifting towards the whitewater at its own pace, which is never faster than the slowest a board can go. Hold one spot and the pocket leaves you behind: drift more than about 64 px from the edge and the tube lets go of you 0.3 seconds later.
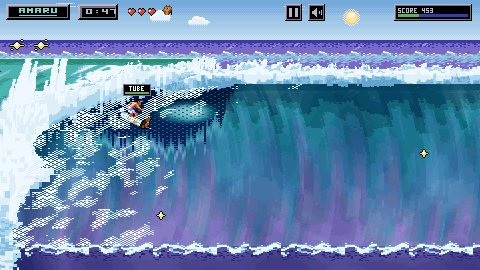
How you can tell
While you are latched in, spray pours across the pocket out of the curtain (a torn, dithered veil you ride behind) and a TUBE chip hangs over your head. When you come out, the spray drains back into the curtain, right to left. If the spray is pouring over you, you are banking tube time.
What it pays
- Ride points scale with how deep in the pocket you are, up to 40 a second right against the edge
- Plus a flat 50 a second while you are latched in the tube
- So roughly 90 points a second deep in the barrel
The escape boost
Come out cleanly and the tube pays you in speed, not points:
- You must have been in there at least 0.6 seconds. Below that, a graze banks nothing at all.
- You gain 110 px/s of bonus speed for every second you spent inside, capped at 180
- Your speed ceiling is lifted from 260 to 440 px/s for a 4-second window
- Getting swallowed forfeits the whole bank. There is no consolation prize for a barrel you did not get out of
- You will know it paid: the barrel spits spray out behind you and a BOOST chip rides with you while the window is open
Over the wave
This is the best move in the game. Launch off the lip while the boost window is still open and the launch is multiplied by another 1.4× on top of your approach-angle bonus. A perfect-angle over-the-wave launch leaves the lip at 392 px/s or more.
Land it cleanly and it is worth 500 points. Land it badly and it is worth nothing, like any other blown landing. The sequence is: carve into the pocket → get barrelled → escape clean → climb for the lip at 48° → straighten up for the flat bar.
Scoring
| What | Worth |
|---|---|
| Riding the open face | 10/second, multiplied up to 40/second the closer you ride to the foam |
| Inside the tube | +50/second on top of that |
| Railing the lip | A flat 45/second (this replaces the pocket bonus, it does not stack) |
| A landed trick | 100 × quarter-turns landed × your combo, and then the combo goes up |
| A blown landing | Nothing. The wipeout is the price. |
| A star pickup | 100 |
| Landing the over-the-wave move | 500 |
| Escaping the tube | No points: it pays in speed |
| Running into the other rider | −250 each, floored at zero |
Your combo multiplier starts at 1. The first clean trick landing takes it to 2, and every clean landing after that closes a third of the gap to 4 (2, 2.67, 3.11, 3.41, 3.60 and on), so it keeps climbing but never quite gets there. A trick is paid at the combo you had going into it, then the combo goes up. The chip under your score shows it rounded (COMBO ×3). Any wipeout resets it to 1, and so does a collision with the other rider. The combo is why a run of clean landings is worth so much more than the same tricks spread across several lives.
The judges
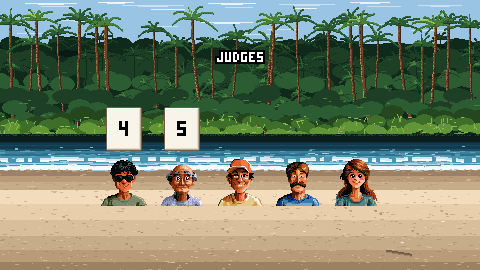
After every heat, five faces hold up cards from 0 to 10, one after another. None of it touches your score. The results card behind them says what the heat was actually worth; the panel says what the panel thought of it.
The cards follow the verdict, so they never argue with the word printed underneath:
- Failed the heat: the panel scores in the 2–6 band. A 2 is nothing at all; a 6 is a near miss.
- Passed the heat: the 7–10 band. A 7 is right on the target; a 10 means you beat it by 20% or more.
Two of them are watching something of their own on top of that:
- The one in the shades is here for the barrel. Around 2 seconds of tube time reads as a full ride to him; a heat with no barrel at all he marks down.
- The one in the cap is here for the tricks. Three quarter-turns landed reads as a full routine to him; a heat with none he marks down.
The others just read the numbers. Each judge then adds their own point either way, so the panel disagrees a little and reads as five people rather than one number printed five times. But a barrel on a failed heat buys you a 5 instead of a 2, never a 7.
The whole panel is deterministic: the same heat result always produces the same five cards, on a retry, on any device.
Amaru
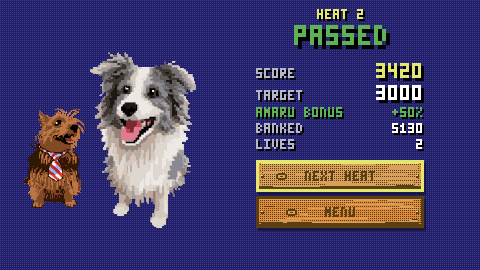
Amaru is a yorkie, and on most heats he rides the nose of your board. He barks. He wears a necktie.
Finish a heat with him still aboard and the heat pays +50%. Since he only ever leaves the board in a wipeout, that is the same as saying: finish the heat without a single wipeout.
Wipe out once and he is gone for the rest of that heat, and the bonus with him. He is not offered back.
He is never hurt
A wipeout sends him off the nose into a clean dive, his own little plunge, mirroring yours. He surfaces paddling, swims off toward the shoulder, and the heat ends with a cutaway of him walking out onto the sand. That is the whole point of the mechanic: what you risk is the bonus, and the dog is always fine.
When he shows up
- The first heat of every run always carries him
- After that it is roughly two heats in three
- He is never absent twice in a row: one dry heat forces the next
- Retrying a heat rerolls it, so a heat that came up dry is worth another go for more than the score
- The heat card tells you before the drop-in: AMARU RIDES WITH YOU
The bonus applies to your banked total, not to the target: passing a heat is judged on your raw score. In a two-rider heat the winner is decided on raw scores too. The bonus is a reward for a clean ride, not a way to buy a heat off someone who out-surfed you.
Heats and lives
A run is six heats. You start with three lives, and they are a run pool: they carry from heat to heat and are only refilled by starting a new run from the title screen.
- Every wipeout costs a life
- Missing a heat's target score also costs a life
- Miss the target with lives left and you get RETRY; the retry is paid for, not free
- Run out of lives and the run is over
- Clear all six and you get the ALL CLEAR card
| Heat | Clock | Target | Wave | Sharks |
|---|---|---|---|---|
| 1 | 60s | 1,500 | Steady | 15% |
| 2 | 75s | 3,000 | Fast | 30% |
| 3 | 90s | 4,200 | Heavy | 45% |
| 4 | 90s | 5,000 | Heavy | 55% |
| 5 | 95s | 6,300 | Heavy | 65% |
| 6 | 100s | 7,800 | Heavy | 75% |
"Wave" is the word the heat card uses. "Sharks" is the share of hazard spawns that are sharks rather than buoys or driftwood. The water also gets faster and the face busier every heat, even where the card's word stays the same. By heat 6 the target is asking for a near-perfect ride. Whatever a heat's length, the break takes half of it to reach its cap.
Playing alone
From the title screen, START opens the PLAYERS card:
- PRACTICE: the solo run described above
- VS COMPUTER: the heats head to head against the computer rider, at EASY, NORMAL or HARD
- 2 PLAYERS: two riders on one screen, in Playing together
There is no global difficulty setting. The three skill levels apply only to the computer opponent; the heat table is the difficulty curve and it is fixed. VS COMPUTER is also on the MULTIPLAYER screen, where it skips the skill question and goes straight to the heat card at the last skill you picked, or NORMAL if you have not picked one.
Playing together
Local multiplayer over WiFi, two controllers on one screen, and driving the menus with a controller are on a page of their own: Playing together.